Note: This is an ongoing project that will be updated as significant progress is made in the future
Project Overview
Worcester Polytechnic Institute has a combat robotics club that primarily competes in the 3 lb category, otherwise known as Beetleweight. However, an unexplored territory that the team has explored has been the Full-Combat Antweight class. This is partially due to the main focus being the Beetleweight weight class of combat robotics
This weight class of combat robots is primarily hosted in western Massachusetts and New Jersey. Since May 2025 I have been designing and competing with my own Full-Combat Antweight called Red Hawk.

Red Hawk is a 2-wheel drive robot that uses a motor-driven arm to deliver overhead attacks on opponents with a directly driven saw blade. This form of attack is really powerful, as most robots don’t have the weight on the top and bottom of their robots for steels that can withstand overhead attacks.
The body of Red Hawk’s chassis is made out of TPU, a flexible 3D printing filament that is strong due to its elastic properties. There are carbon fiber plates at the top and bottom of the chassis that stiffens the TPU body, making it very strong.

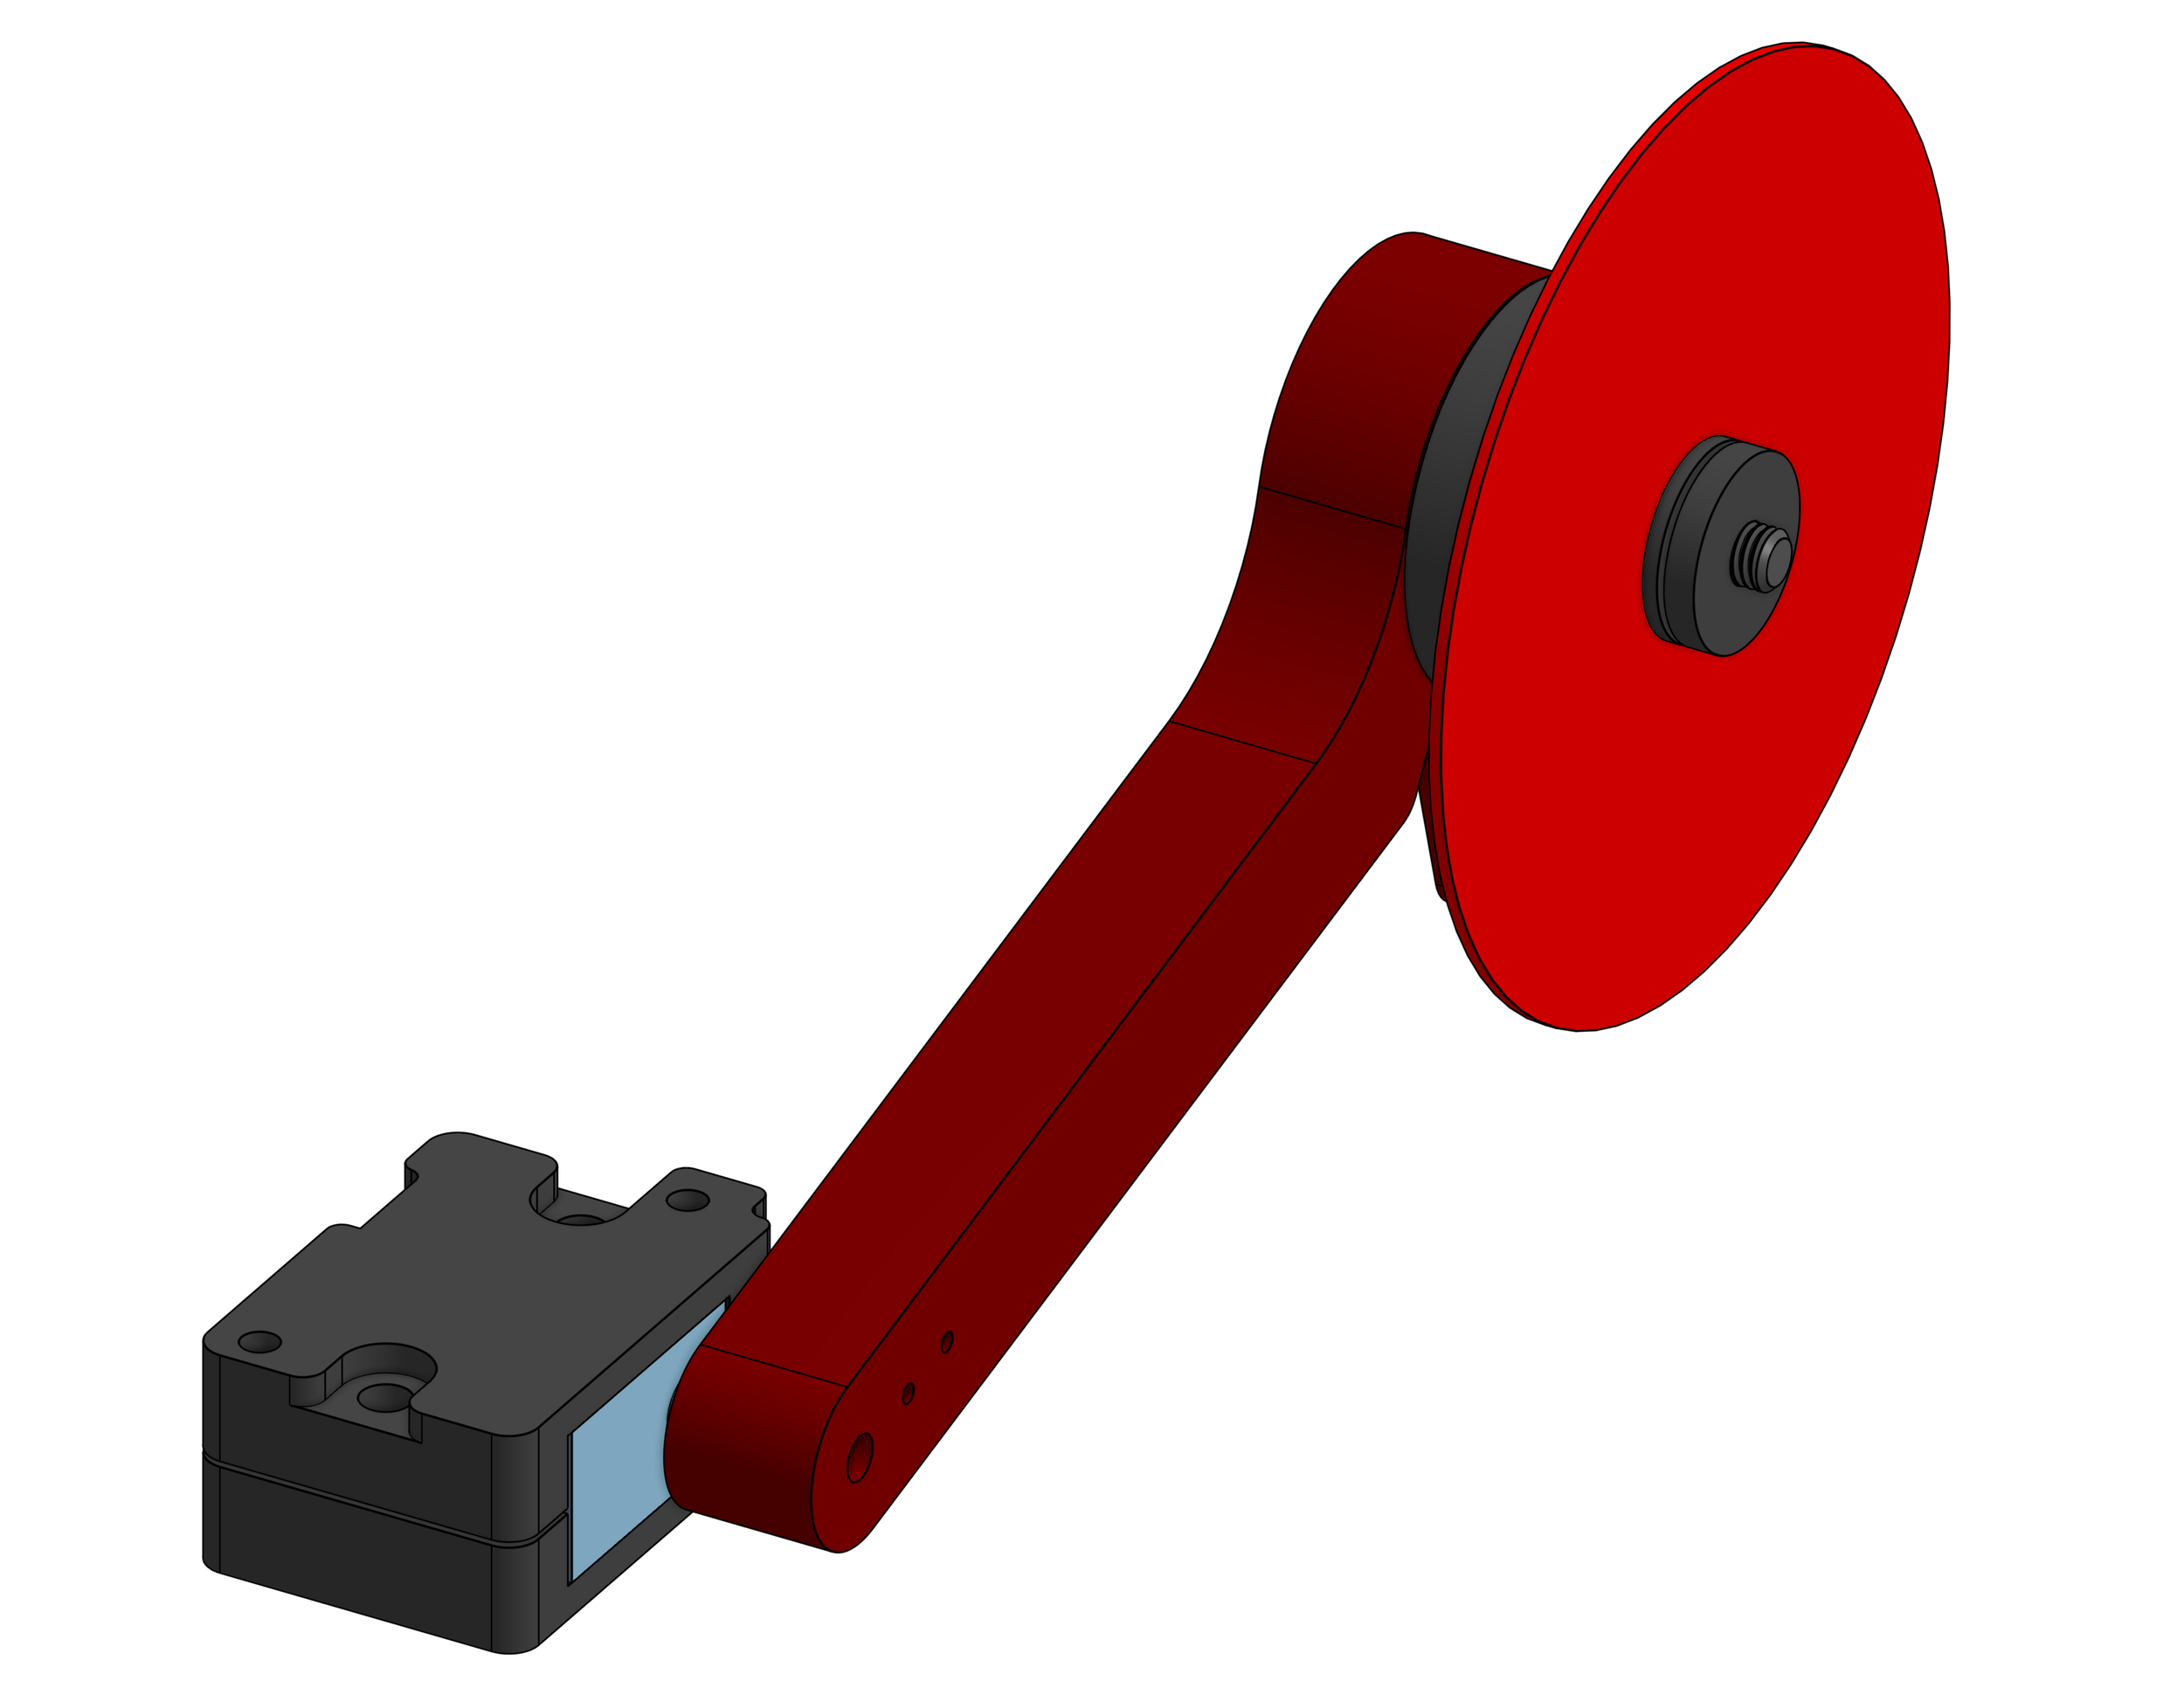
The weapon arm of the robot is driven by a 7 kg-cm servo motor. After extensive research of torque:motor size ratio’s for servo’s, I found a servo at this scale to be the right option
Alongside the chassis, the weapon arm is also made out of TPU. The reasoning behind this is for the arm to absorb the shock of the weapon saw contacting my opponent, as TPU is rubbery in nature. The weapon blade for Version 1 of Red Hawk was a off-cut blade that I found off of Amazon.

V1 Competition Results
In late September of 2025, Red Hawk competed in a local Antweight competition that was run in Fitchburg, MA. This was the same venue that Thimbleberry first debuted in September of 2024. Unlike Thimbleberry, Red Hawk was able to compete in 3 rounds, going 1-2 and sustaining zero significant damage. I was even able to successfully cut through an opponent’s top plate one match!

Photo taken by Geoffrey Edge
Version 2 Revisions
After going through the first design cycle of Red Hawk, there were many aspects of the robot that I could greatly improve. A lot of changes came from the way I distributed the mass of the robot, as well as more configurations for different matchups.
Here are some of the major configurations I have made. Each version has their own strong and weak matchups to go up against
Standard Configuration

This is the standard configuration that I use against common robot archetypes like vertical spinners and drum spinners. This configuration uses AR500 Steel Forks that maximizes grounding against my opponent
Anti-Horizontal Configuration

This is the configuration I use against robots that use horizontal spinning weapons. It uses a titanium wedge that serves as a substitute to the steel forks, which would have faced some major bends in these matchups
Anti-Overhead Configuration

This is the configuration I use against robots that use overhead attacks similar to mine. For this config, I am utilizing 1075 Spring Steel top plates instead of Carbon Fiber. I also am using TPU 3D Printed Baleen Forks. These serve as a way to catch my opponent, while providing the weight I need to run heavier top armor.
One of the big issues that came from Red Hawk’s first competition was the stiffness of the weapon arm. The level of flexibility that came from the arm resulting in the arm sagging at an angle in which I couldn’t use the force of the arm retraction to return me back into place. This resulted in my robot permanently stuck, resulting in a match loss.
To achieve the right ratio of stiffness:flexibility, the weapon arm will be printed with TPU, but with the maximum amount of print walls I can achieve. The reasoning behind this is the level of infill and number of print walls greatly affects the flexibility of your TPU print. A printed weapon arm with all print walls should, in theory, allow for a stiff arm while having the necessary flexibility to absorb any shock from the weapon.
Additional changes to the Weapon Arm Assembly includes both an increase in weapon arm thickness from .375” to .5”, as well as a change in weapon blades to a more consistent option produced by Diablo

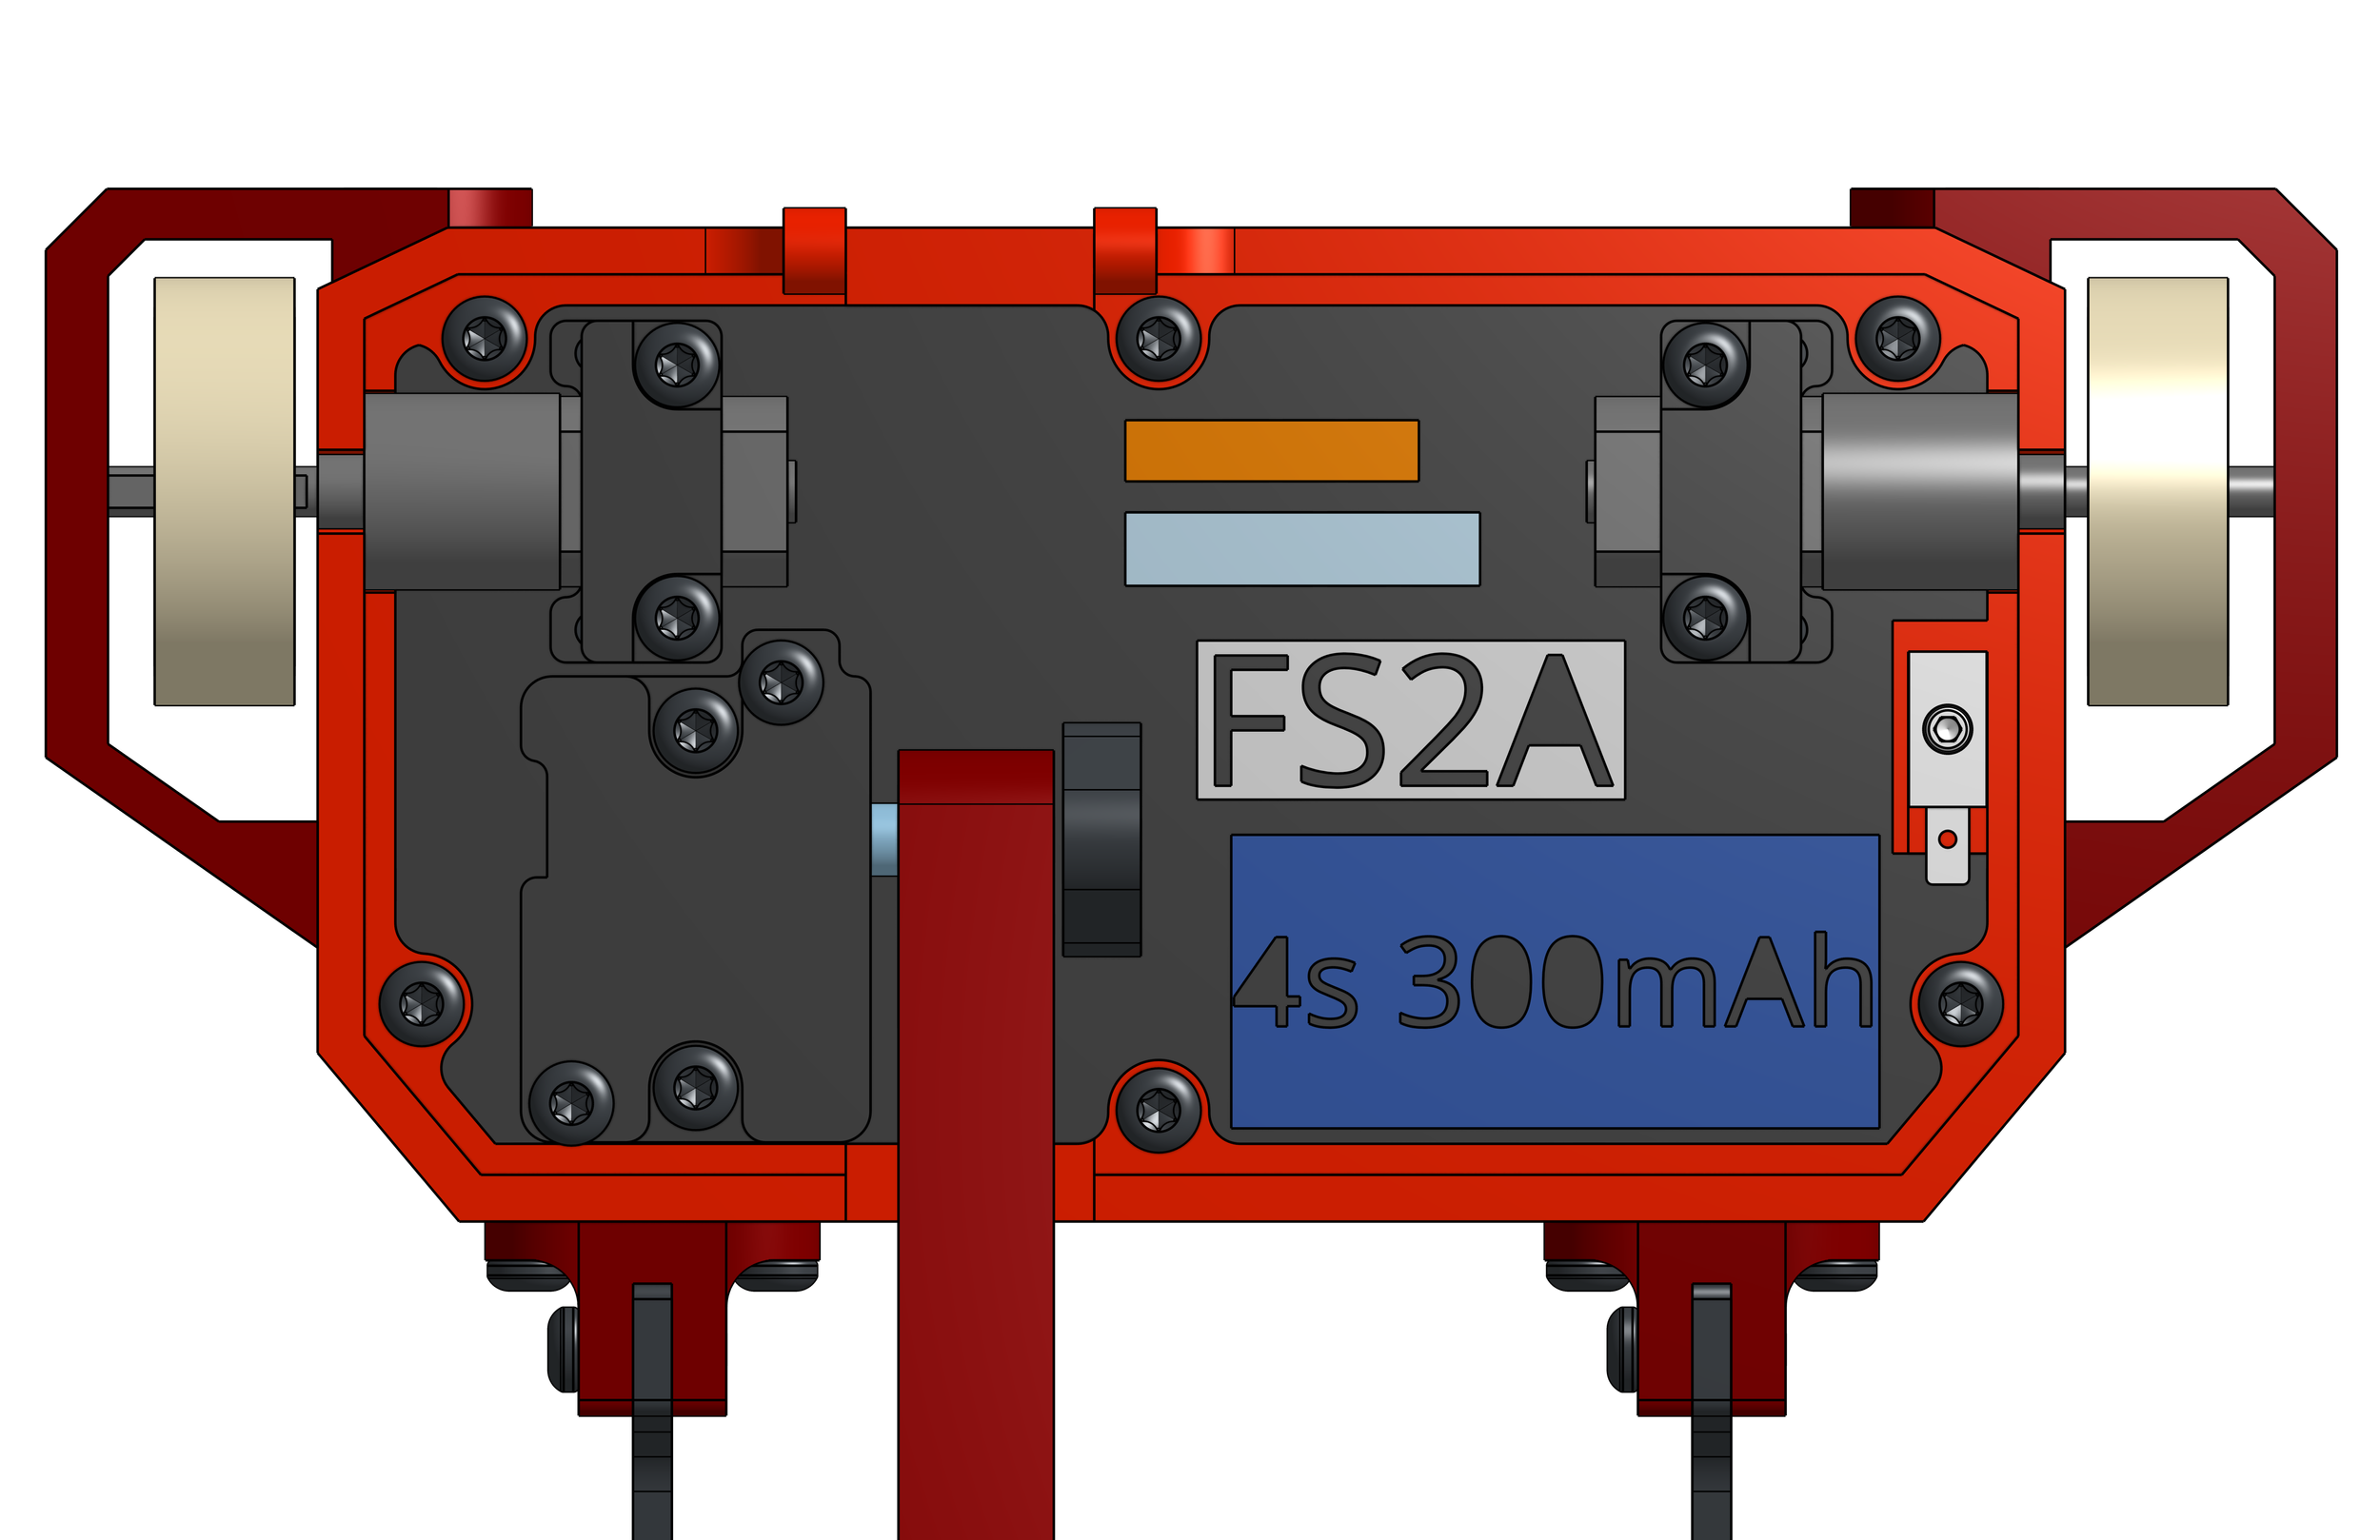
Additionally, I decided to hone in on where I distribute my robot’s weight. I did this by pushing the servo motor to the front-left corner of the chassis, while pushing the battery more towards the front of the robot. The drive motors are also pushed to the back of the chassis. The wheel hubs used in the drive assembly are also a newer, lighter option sold by the same manufacturer.
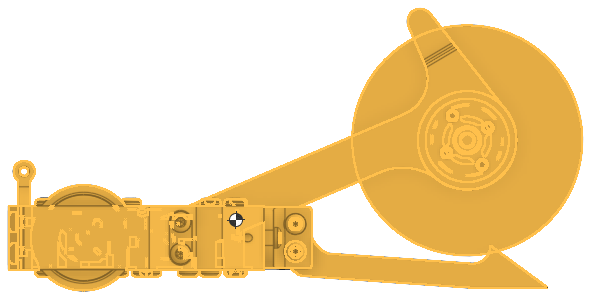
Here is an image of the electronics placement of my chassis electronics, as well as the center of mass of my standard configuring, both in resting and attacking positions.